Endpoints View
The endpoints view displays a list of all reachable agrirouter endpoints. Endpoints are the representation of the farmer’s software components in the agrirouter account that your IO-Tool account is connected to. Such components can be Communication units (e.g. a terminal or a telemetry unit), a farm software (e.g. a farm management system or fleet management system) or connected accounts.
|
In order to exchange data, you must have an endpoint (e.g. your farming software or, in the case of this documentation, a second IO-Tool account) connected to the same agrirouter account. The connection of additional endpoints follows the same steps as the onboarding steps of the IO-Tool. |
|
The endpoint list will be updated automatically when you switch to the Endpoint section. Additionally you can use the Reload button to force it. |
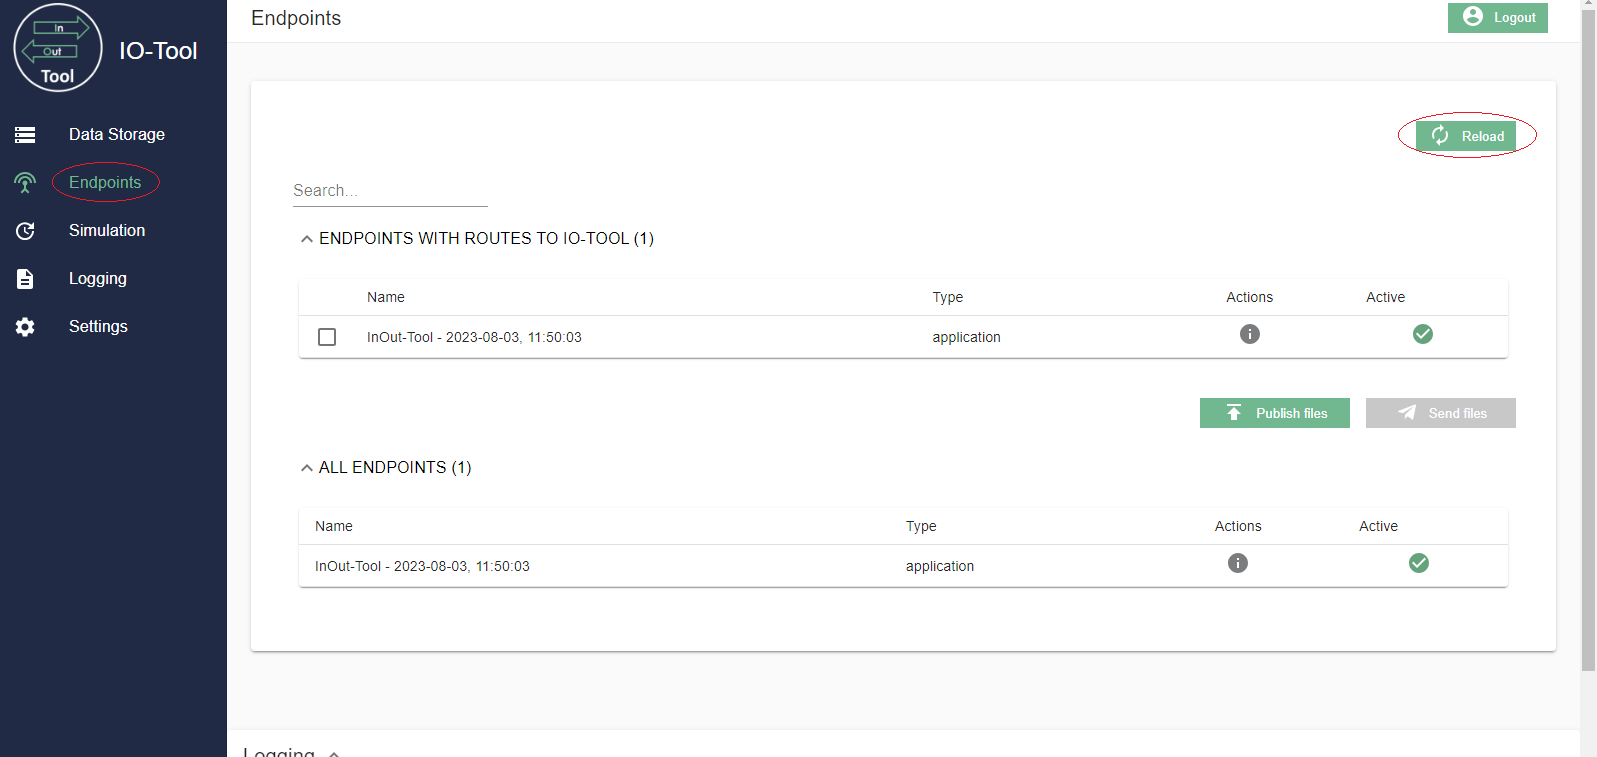
Search endpoints
The search function allows you to search for an endpoint in the list using a keyword from its name.

Reload
The Reload button helps to refresh the content e.g. to see a newly added endpoint (Normally the endpoint list is updated automatically when you switch to the Endpoints section, but if you were in this section initially you will need to use the Reload button.).

Endpoint List
In the endpoints list you have some useful information besides the name of the endpoint.

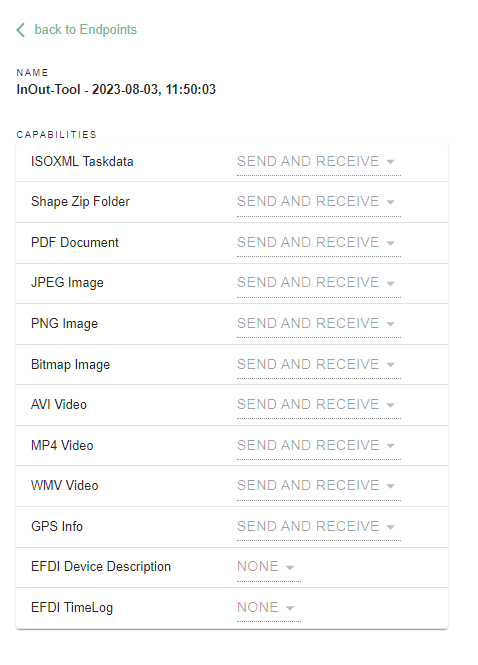
Firstly, the tool specifies the type of the endpoint. Using the Actions button you can receive information about the capabilities of the particular endpoint.
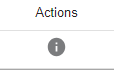
This helps you to check if both capabilities and the routings set in the agrirouter are correct.
The tick in the Active column indicates whether the endpoint is reachable. A missing tick means that the endpoint has been deactivated (in the agrirouter). For more information on activating and deactivating an endpoint, refer to the enduser documentation.
Setting Routings
Once you have connected your IO-Tool and another endpoint to the same agrirouter account, you might need to switch to the agrirouter to set routes. Depending on if you develope a communication unit or a farming software, different actions are required.
The reason for this is that the IO-Tool is registered in agrirouter to be a Farming Software.
Development of communication unit
If you are developing a telemetry unit, you can use the IO-Tool and the communication works out of the box.
Development of farming software
If you are a developer working on a farming software, you will most likely use the IO-Tool as a corresponding "Communication unit" endpoint; sending finished TaskSets or Telemetry.
The agrirouter will still think that the IO-Tool is farming software. Therefore there will be no routes between your software and the IO-Tool.
In the control center of your agrirouter account, you will see the following screen, where you can click on the plus sign to activate a new route.
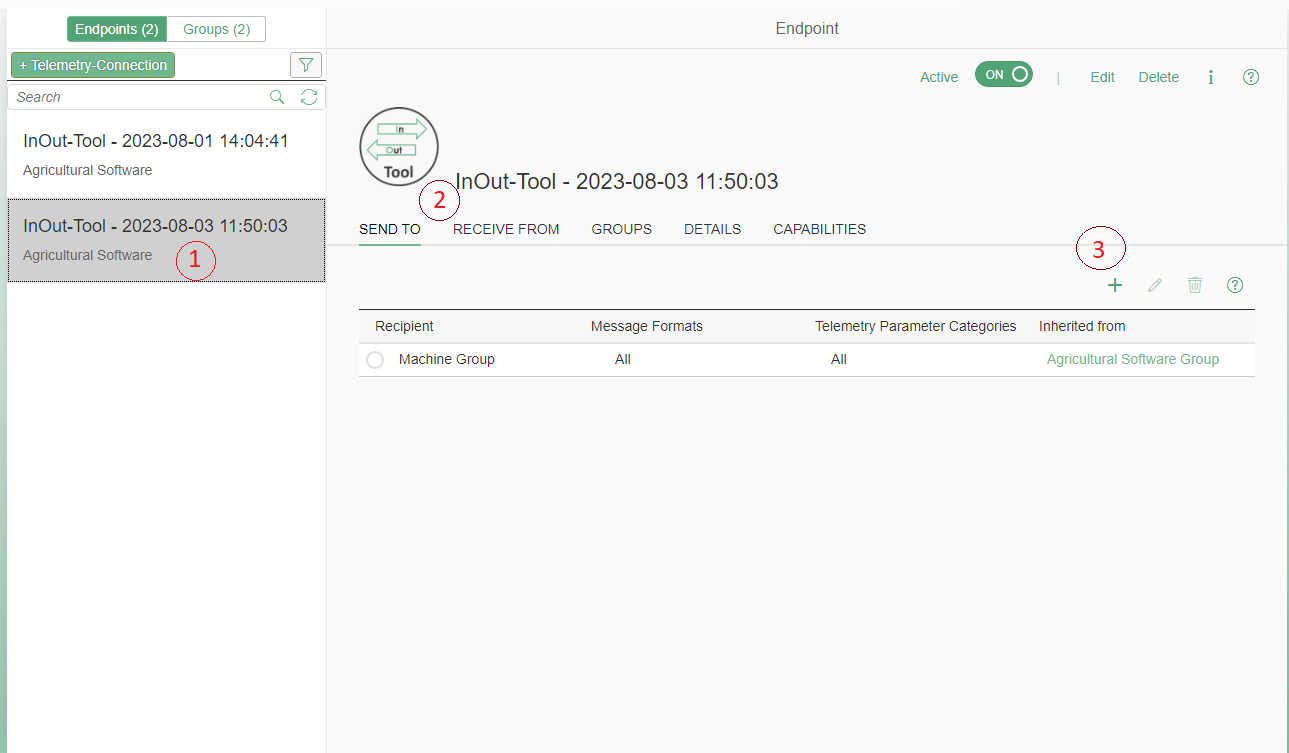
After clicking on the plus sign you can select the recipient from the list (for the purposes of this documentation we will simply select another IO-Tool account, in your case this could be your farming software or telemetry unit).
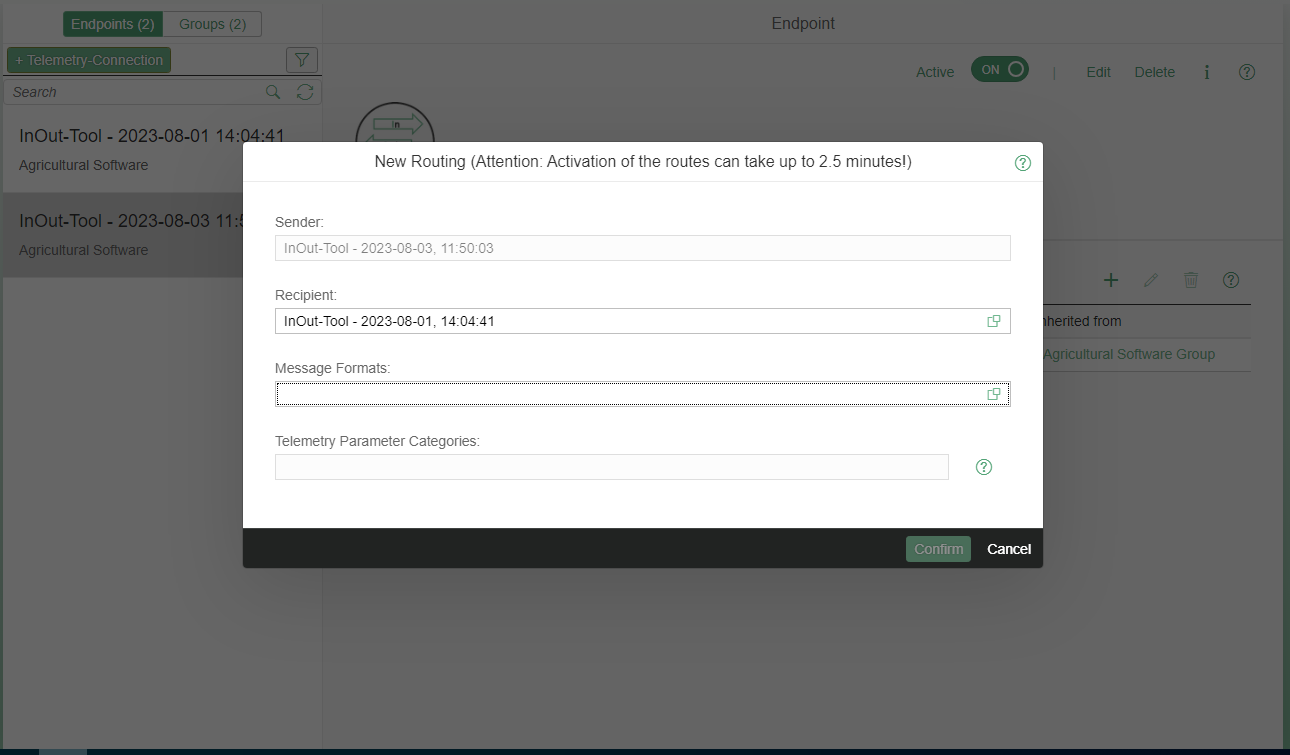
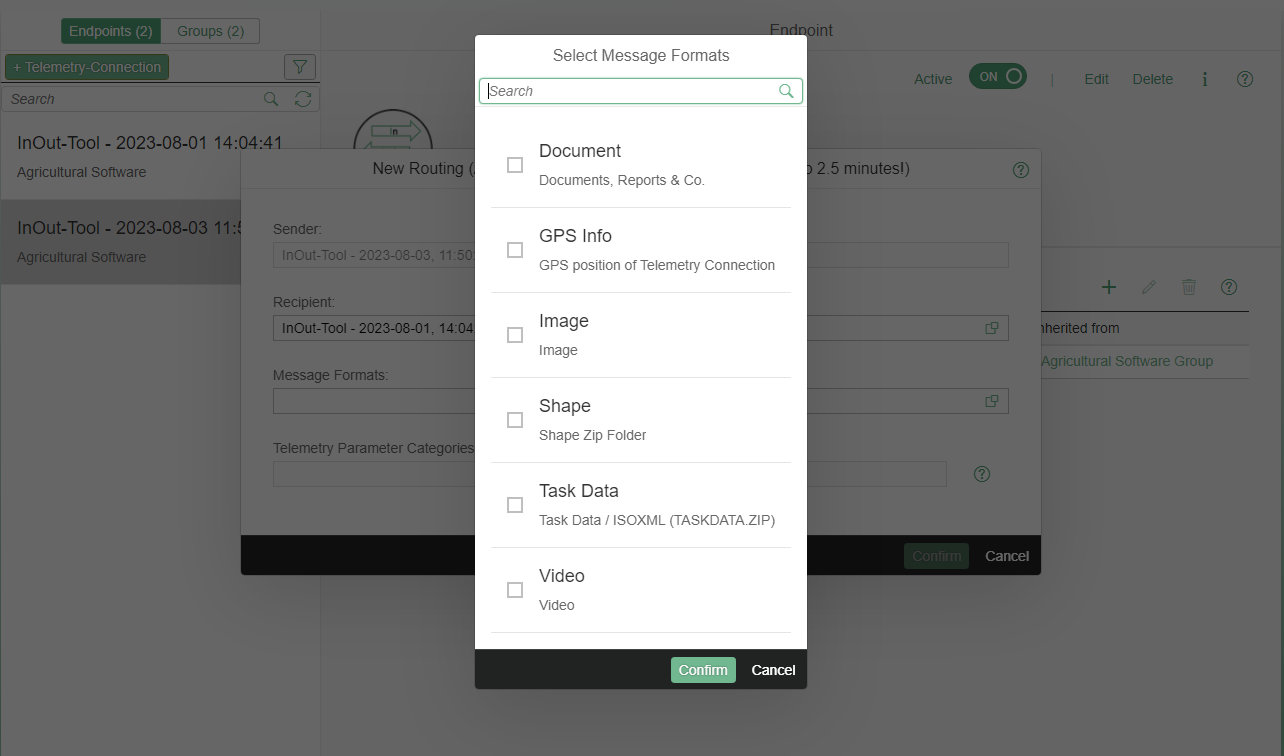
You also have the choice of which message formats you would like to allow.
|
If no message formats can be selected in this view, it means that your farming software has not yet sent any capabilities. |
Follow the same steps for the "Receive From" tab to add a sender.
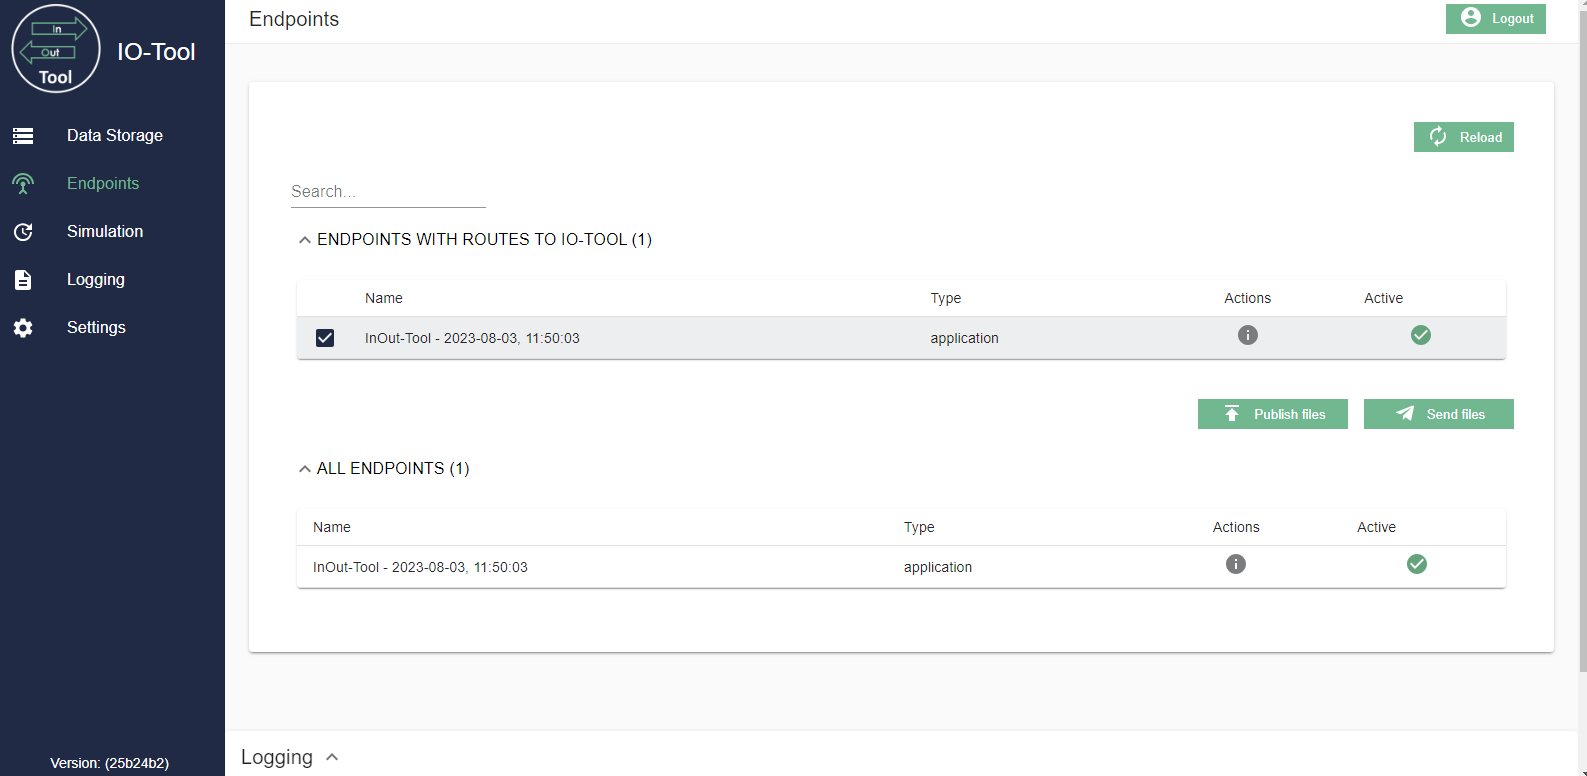
If you now go back to your IO-Tool a new endpoint will be added.
|
Please be aware that it can take up to 5 minutes until the new endpoint shows up in the IO Tool. The view will not automatically be updated. |
|
Please note, that the sections ENDPOINTS WITH ROUTES TO IO-TOOL and ALL ENDPOINTS are identical. 
|
See the end user documentation for more information on setting up routings.
Once all these steps have been completed, the endpoint can be used to exchange data.
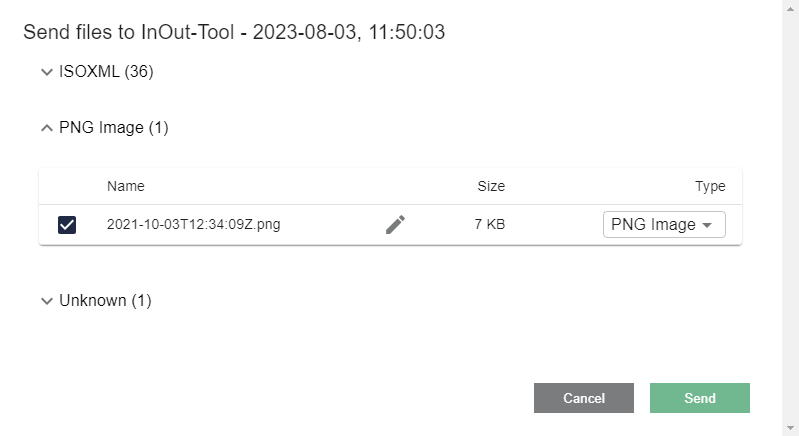
File sending
You can send files from this view as well as from the xhref:tools/io-tool/datastorage.adoc[DataStorage view]. Once you have selected your preferred endpoint from the list, the Send button becomes active.
After clicking one of the buttons, a new window will appear with the files from your Data Storage. Here you can select one or more files and simply click Send.